

The Tiling Process and Methods
TILE OR NATURAL STONE CAN ADD ELEGANCE AND STYLE TO ANY ROOM IN YOUR HOME. INSTALLING TILE SOLELY FOR AESTHETIC REASONS IS FINE, BUT TILE ALSO OFFERS DURABILITY, PRACTICALITY, AND LOW MAINTENANCE UPKEEP.
IF YOU WANT TO ENJOY YOUR TILE FOR YEARS TO COME IT IS IMPORTANT THAT IT IS INSTALLED CORRECTLY AND THAT THERE ARE NO SHORTCUTS TAKEN DURING THE INSTALLATION PROCESS. A GOOD FOUNDATION IS CRUCIAL. WITHOUT A GOOD SUBSTRATE, TILE AND GROUT WILL FAIL. TILE MASTERS USES ONLY THE FINEST CEMENT BOARDS, THINSETS, MASTICS, AND GROUTS AVAILABLE, AS WELL AS USING THE LATEST TECHNOLOGY, TOOLS, AND EQUIPMENT ON THE MARKET TODAY.
STEP 1: First we make sure that the frame or foundation of the floor or walls is sound. If it is not we will repair floor joists or wall studs before installing the substrate. Again, it is crucial that you have a sound foundation before installing tile. I cannot emphasize this point enough.
STEP 2: Now that we are sure that we have a solid foundation it is time to install the substrate, which is also part of the foundation. First we comb (or spread) a layer of thinset on the floor (which is usually plywood or a wood type product), using the appropriate trowel. Next we drop the cement substrate into place, measuring and cutting when necessary. Next we fasten the substrate to the floor using screws. If we are tiling walls it is not necessary to spread thinset under substrate.
STEP 3: Now that the substrate is installed it is important that you tape and mud all the seams. This helps to solidify the floor. If this is not done tiles could crack along the seams. This is a common problem with "do-it-your-selfers" and inexperienced installers.
STEP 4: Now that the substrate is in and the seams are taped and mudded, it is time to "lay out" the tile. When installing tile you shouldn't just pick a corner and start. If you do this it could result in an unbalanced look, very small pieces where you finish, or cut edges where you should have factory edges. This does not affect the strength of the job, but, in our opinion, is not good for the aesthetics of the installation. This is a common problem with inexperienced installers who don't put much effort into "laying out the job" prior to installation. Time should be taken to carefully look at every corner, every nook and cranny, every section of the floor or wall to ensure that when the tile is installed the end result is pleasing to the eye.
STEP 5: Now that we have carefully determined our layout it is finally time to start installing tile. When installing tile during cold weather months, tile should be brought into the house overnight to acclimate. If this is not done it could result in poor adhesion to the substrate, and thus the floor failing prematurely. First we mix thinset, choose the appropriate trowel for the job, spread our thinset and start dropping and pushing tiles into place using a twisting motion; this "pushing and twisting" ensures good transfer of thinset from floor to tile resulting in a good bond. We mark and cut when necessary and use tile spacers to ensure consistent spacing between tiles.
STEP 6: Now that all the tile is installed it is important that there is no traffic on floor overnight. The next day, the first thing we do is pull all the tile spacers and clean out the grout joints prior to grouting. This is important — you don't want to see thinset protruding up through a grout joint. Now that the joints are clean it's time to mix and spread grout. Let grout set up for about 10 minutes after spreading, then start wiping down with clean water and sponges.
STEP 7: After the tile has been grouted and washed we need to let it "haze over" and when the grout has "snapped off," or hardened, we can wipe it down one more time with clean water or buff it with a clean terrycloth towel. Grout sealer should be applied approximately one week after installation. This will prevent anything from staining the grout. Grout is porous and should be sealed.
If these steps are carefully taken, you will enjoy your tile for many, many years.
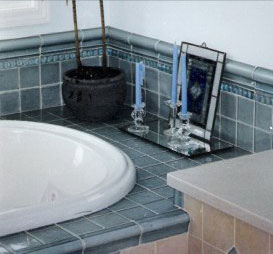
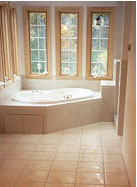
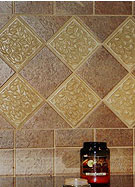
Please visit the Photo Gallery for examples of our completed projects.
![]()